
Image Source: i.ytimg.com
How To Adjust Lawn Sprinkler Heads: Perfect Watering
Can you adjust lawn sprinkler heads yourself? Yes, you absolutely can! Adjusting your lawn sprinkler heads is a key step to ensuring your grass and plants receive the right amount of water, without waste. This guide will walk you through the process, from identifying common issues to making precise tweaks for optimal lawn health.
Why Sprinkler Head Adjustment Matters
Over-watered lawns can develop fungal diseases and shallow root systems, making them weaker and more susceptible to drought. Under-watered lawns, on the other hand, become brown, dry, and stressed. Proper sprinkler head adjustment is crucial for water conservation, preventing runoff into storm drains, and promoting a lush, healthy landscape. It’s about giving each plant the precise amount of hydration it needs.
Common Sprinkler Head Problems and Solutions
Before you start adjusting, it’s helpful to know what problems you might be encountering.
- Watering the Sidewalk or Driveway: This is a common sign that sprinkler arc adjustment is needed. The spray is going beyond the intended area.
- Dry Patches: Indicates that a sprinkler head might not be reaching a certain area or that the spray pattern is too narrow. Sprinkler range adjustment or changing the sprinkler nozzle replacement might be necessary.
- Pooling Water: Suggests over-watering in a specific spot, possibly due to an incorrect spray pattern or a head that’s too close.
- Heads Spraying Unevenly: This could be due to clogged nozzles, worn-out parts, or simply needing sprinkler head alignment.
- Low Water Pressure: While not always an adjustment issue, it can impact spray patterns and coverage.
Types of Sprinkler Heads and Their Adjustments
Most residential sprinkler systems use one of two main types of sprinkler heads: spray heads and rotor heads. Pop-up sprinkler adjustment techniques vary slightly between them.
Spray Sprinkler Adjustment
Spray sprinkler heads, also known as fixed spray heads, spray a fan-shaped pattern of water. They are typically used for smaller, irregularly shaped lawn areas.
Adjusting the Arc:
The arc refers to the angle of the spray. Most spray heads allow you to adjust this from a narrow strip (like 90 degrees) to a full circle (360 degrees).
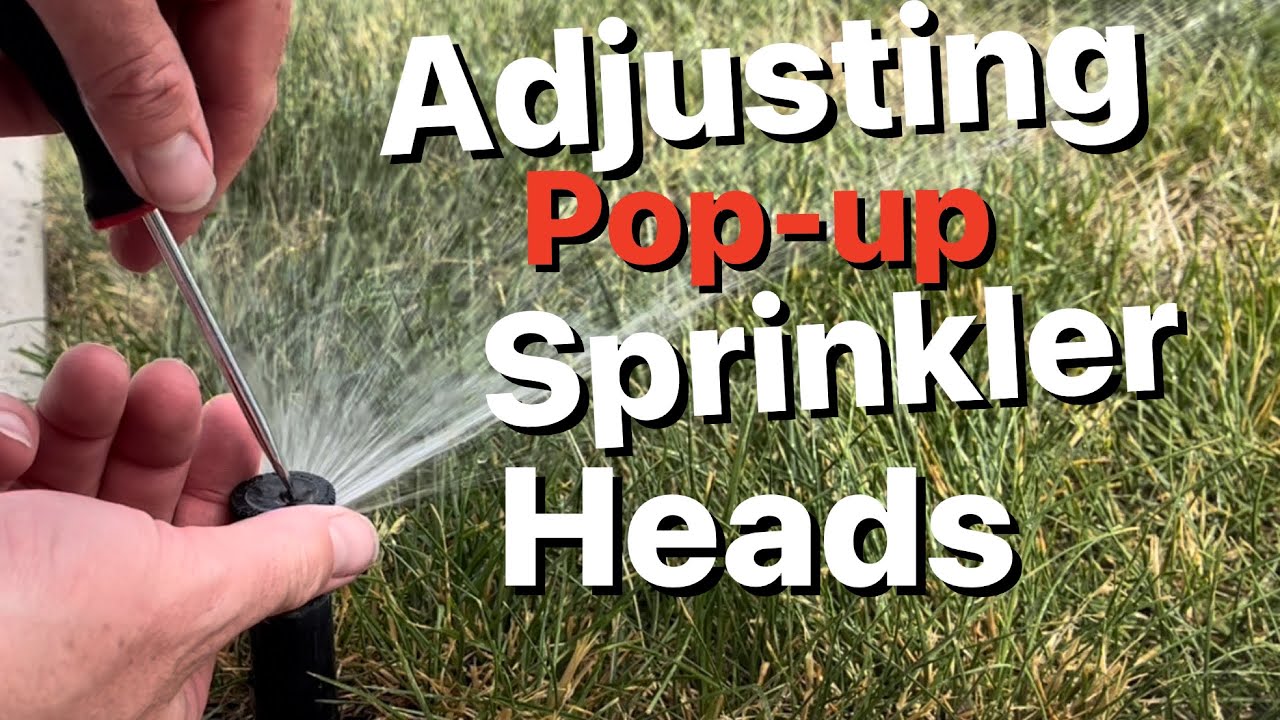
- Identify the Adjustment Screw: Look for a small screw, often brass or plastic, located on top of the sprinkler head. Some newer models might use a locking ring instead.
- Set the Starting Point: Many spray heads have a fixed left-side stop. You may need to rotate the spray head body to orient this stop where you want the spray to begin.
- Adjust the Arc:
- For screw-type adjustments: Insert a flathead screwdriver into the adjustment screw. Turn the screw clockwise to decrease the arc and counter-clockwise to increase it. You’ll usually feel the mechanism click as you make adjustments.
- For locking ring adjustments: Twist the locking ring to adjust the arc.
- Test the Coverage: Turn on the water to see how the spray pattern covers the desired area. Make further adjustments as needed.
Adjusting the Radius/Range:
The radius is how far the water sprays.
- Locate the Radius Adjustment Screw: This is often the same screw used for arc adjustment on many spray heads. Sometimes, it’s a separate screw.
- Adjust the Range:
- Turn the screw clockwise to decrease the spray distance.
- Turn the screw counter-clockwise to increase the spray distance.
- Be careful not to over-tighten, as this can damage the mechanism.
Sprinkler Nozzle Replacement:
If you can’t achieve the desired coverage or pattern with adjustments, or if the existing nozzle is damaged, you might need to replace the sprinkler nozzle.
- Turn off the water supply to the zone.
- Gently unscrew the old nozzle from the sprinkler head.
- Identify the correct replacement nozzle. Nozzles come in different spray patterns (e.g., full circle, half circle, quarter circle) and flow rates. Match the new nozzle to the needs of the area and the surrounding heads.
- Screw the new nozzle onto the sprinkler head. Hand-tighten is usually sufficient.
- Turn the water back on and test.
Pop-Up Sprinkler Adjustment (Rotor Heads)
Rotor sprinkler heads rotate, spraying a stream of water over a wider area. They are best suited for larger, open lawn spaces. Pop-up sprinkler adjustment for rotors primarily involves setting the arc and range.
Adjusting the Arc:
Rotor heads typically have a more sophisticated arc adjustment mechanism.
- Locate the Adjustment Slot: On the top of the rotor head, you’ll find a slot or screw. This is usually where you make arc adjustments.
- Identify the Left Stop: Rotor heads have a permanently set left-side stop. You cannot change this stop’s position; it dictates the starting point of the spray.
- Adjust the Arc:
- For screw-type adjustments: Insert a flathead screwdriver into the slot. Rotate the screw. Turning it clockwise generally decreases the arc, and counter-clockwise increases it.
- Observe the rotation: Some adjustments require the sprinkler to be running to see the effect. Others can be adjusted while the system is off. Check your specific model’s instructions.
- Important: You can typically adjust the arc from 40 degrees up to 360 degrees. You cannot arbitrarily set a starting point; you are adjusting the end point of the spray, relative to the fixed left stop.
- Test: Run the sprinkler zone to confirm the desired coverage.
Adjusting the Range (Radius):
The range adjustment on rotor heads controls how far the stream of water travels.
- Locate the Radius Adjustment Screw: This is usually a screw on the top of the rotor head, often a large slotted screw.
- Adjust the Range:
- Turn the screw clockwise to reduce the spray distance.
- Turn the screw counter-clockwise to increase the spray distance.
- Again, be gentle and avoid over-tightening.
Sprinkler Head Alignment:
Proper sprinkler head alignment is crucial for effective watering and preventing damage.
- Check for Obstructions: Ensure the sprinkler head is not blocked by plants, rocks, or other landscaping features. Trim back any encroaching vegetation.
- Verify Verticality: The sprinkler head should be straight up and down. If it’s tilted, it can affect the spray pattern and cause uneven watering. You might need to gently push the riser back into an upright position or adjust the soil around the base.
- Ensure Consistent Height: All sprinkler heads within a zone should ideally pop up to the same height above the ground. If one is significantly higher or lower, it can lead to coverage issues. If a head is too low, debris can enter and clog it. If it’s too high, it can be damaged by mowers.
Impact Sprinkler Adjustment
Impact sprinklers are known for their distinctive “tick-tick-tick” sound as they rotate. They are very durable and suitable for large areas.
Adjusting the Arc:
Impact sprinklers have a more mechanical arc adjustment.
- Locate the Arc Adjustment Collar: On the sprinkler head, you’ll usually find a collar with markings for degrees or numbered settings.
- Set the Left Stop: Many impact sprinklers have a pin or lever that you can set to determine the left-most point of the spray.
- Adjust the Arc:
- Rotate the collar to set the desired degree of rotation, or adjust the pin/lever for the starting point.
- Some models have a trip mechanism that you can move to set the right-side stop, thereby defining the arc.
- Test: Turn on the water to verify the pattern.
Adjusting the Range:
The range on impact sprinklers is usually adjusted by controlling the water pressure or by adjusting a diffuser pin.
- Water Pressure: Ensure your system’s water pressure is appropriate for the impact sprinkler. Too little pressure will result in a short, weak spray; too much can cause excessive misting and loss of distance.
- Diffuser Pin: Many impact sprinklers have a small screw or pin on the nozzle. Adjusting this pin can either break up the water stream into a finer spray (increasing range and coverage uniformity) or create a more concentrated stream (reducing range). Experiment with small adjustments.
Drip Irrigation Adjustment
While not a sprinkler head, drip irrigation systems also require adjustments to ensure efficient watering.
- Emitter Flow Rate: Drip emitters have different flow rates (gallons per hour). For plants with different water needs, you can use emitters with varying flow rates in the same zone, or create separate zones for plants with significantly different requirements.
- Drip Line Placement: Ensure the drip lines are positioned close to the root zones of your plants.
- Pressure Regulators: These are crucial for drip systems to maintain consistent pressure, ensuring all emitters deliver water at the intended rate.
- Filters: Keep drip system filters clean to prevent clogs that can reduce water flow to emitters.
Tools You Might Need
- Flathead Screwdriver: For most spray and rotor head adjustments.
- Phillips Head Screwdriver: For some specific models.
- Small Pliers: For gripping or turning small adjustment parts.
- Replacement Nozzles: If you need to change the spray pattern or flow rate.
- Wire Brush: For cleaning clogged nozzles.
- Measuring Tape: To check the spray radius.
- Your Sprinkler System Manual: Always a good reference for specific adjustments.
Step-by-Step Guide to Sprinkler Head Adjustment
- Identify the Zone: Determine which sprinkler zone you need to adjust. This is usually done by turning on your sprinkler system’s controller.
- Observe the Sprinkler in Action: Turn on the zone and watch each sprinkler head. Note any issues like overspray, dry spots, or uneven coverage.
- Adjust the Arc:
- For spray heads, set the left stop where you want the spray to begin. Then, adjust the arc screw to control the end point.
- For rotor heads, the left stop is fixed. Adjust the arc screw to control the end point of rotation.
- Adjust the Range:
- For spray heads, use the radius adjustment screw to shorten or lengthen the spray distance.
- For rotor heads, use the radius adjustment screw.
- Check Sprinkler Head Alignment: Ensure heads are upright and at the correct height.
- Test and Refine: Turn the zone on again and observe the results. Make small, incremental adjustments until you achieve the desired coverage. It might take a few tries to get it perfect.
- Consider Nozzle Replacement: If adjustments aren’t sufficient, consider replacing the sprinkler nozzle with one that has a different spray pattern or flow rate. This is particularly useful if you have a mix of lawn types and garden beds in the same zone, requiring different watering needs.
Advanced Tips for Perfect Watering
- Zone Management: Group plants with similar watering needs into the same sprinkler zone. This allows for more precise control over watering schedules and adjustments.
- Seasonal Adjustments: Lawn watering needs change throughout the year. You may need to adjust sprinkler range and watering duration as temperatures fluctuate and rainfall patterns shift.
- Smart Controllers: Consider upgrading to a smart sprinkler controller that can adjust watering schedules based on local weather data, further optimizing water use.
- Watering Times: Water in the early morning to minimize evaporation and allow plants to absorb water before the heat of the day. Avoid watering in the heat of the midday sun or late at night, which can encourage fungal diseases.
Troubleshooting Common Adjustment Issues
| Problem | Potential Cause | Solution |
|---|---|---|
| Sprinkler won’t pop up | Low water pressure, debris in riser, worn spring | Check water supply, clean riser, replace head if necessary. |
| Sprinkler leaks at base | Loose connection, damaged gasket, cracked body | Tighten fitting, replace gasket, or replace the sprinkler head. |
| Uneven spray pattern | Clogged or worn nozzle, incorrect arc adjustment | Clean or replace nozzle, adjust sprinkler arc and range. |
| Water sprays too far/short | Incorrect range adjustment, low/high water pressure | Adjust range screw, check system pressure, or consider a pressure regulator. |
| Sprinkler head is tilted | Loose installation, soil erosion | Gently reposition the head to be vertical, add soil around the base to secure it. |
| Water lands on hard surfaces | Arc or range set too wide | Reduce the sprinkler arc and range to keep water on the lawn. |
Frequently Asked Questions (FAQ)
Q1: How often should I adjust my sprinkler heads?
A: It’s a good practice to check your sprinkler heads at least twice a year, typically in spring and fall. Seasonal changes in plant growth and weather patterns may require adjustments. Also, inspect them if you notice any issues with your lawn’s watering.
Q2: Can I adjust the sprinkler arc while the system is off?
A: For many spray sprinkler heads, yes. However, for rotor sprinkler heads, it’s often best to have the system running to accurately see how the adjustments affect the spray pattern. Always consult your sprinkler head’s manual for specific instructions.
Q3: What happens if I overtighten the adjustment screw?
A: Overtightening the adjustment screw can strip the threads or damage the internal mechanism of the sprinkler head, rendering it ineffective or requiring replacement. Always turn screws gently and stop when you feel resistance.
Q4: Do I need a professional to adjust my sprinklers?
A: No, most sprinkler head adjustment tasks are straightforward and can be done by homeowners with basic tools. However, if you have a complex system or are uncomfortable making the adjustments, a professional irrigation technician can help.
Q5: How do I know if I need to replace a sprinkler nozzle instead of just adjusting?
A: If you’ve tried adjusting the arc and range and still can’t achieve proper coverage, or if the spray pattern is distorted or weak even after cleaning, it’s likely time for a sprinkler nozzle replacement.
By taking the time to properly adjust your lawn sprinkler heads, you’ll contribute to a healthier, more vibrant lawn, conserve water, and save money on your water bill. Happy watering!