
What is yard leveling? Yard leveling is the process of making your yard’s surface even and smooth. This helps with drainage, makes mowing easier, and creates a better look for your outdoor space. Can I level a yard myself? Yes, you can absolutely tackle DIY yard leveling with the right tools and a clear plan. Who is yard leveling for? It’s for anyone with an uneven yard who wants a more functional and attractive lawn.
A lumpy or bumpy yard can be more than just an eyesore. It can lead to puddles after rain, making mowing a chore and hindering grass growth. Fixing uneven lawn areas is a key step toward a beautiful and healthy lawn. This guide will walk you through the entire process of how to level a yard, from initial assessment to the final touches. We’ll cover everything you need to know about yard grading and soil leveling for a truly perfect lawn.
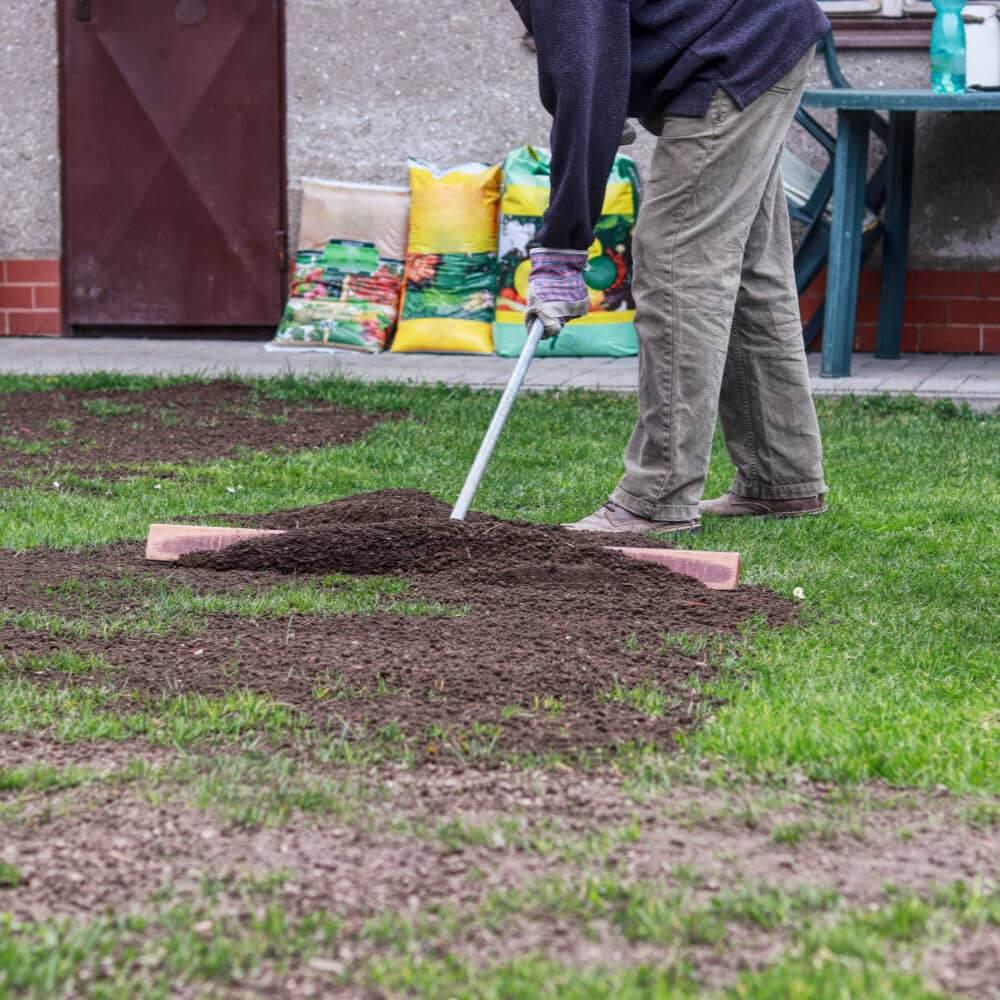
Image Source: dam.thdstatic.com
Why Level Your Yard? The Benefits of a Smooth Surface
Before we dive into the “how,” let’s explore the “why.” A leveled yard offers numerous advantages that go beyond just aesthetics.
Improved Drainage and Water Management
One of the most significant benefits of yard leveling is proper yard drainage. When your lawn has low spots or depressions, water tends to collect there. This can lead to:
- Waterlogged soil: This suffocates grass roots, preventing them from getting oxygen and nutrients.
- Increased risk of disease: Fungal diseases thrive in constantly damp conditions.
- Mosquito breeding grounds: Standing water is a prime spot for mosquitoes to lay their eggs.
- Erosion: Water pooling and running off can wash away valuable topsoil.
By leveling your yard, you create a gentle slope that directs water away from your house and foundation, preventing water damage and keeping your lawn healthy. This landscaping leveling ensures water flows where you want it to.
Easier Mowing and Maintenance
Mowing a bumpy yard is a frustrating experience. Mowers can scalp the grass on high spots and struggle to cut evenly in low areas. This leads to an uneven cut, a less attractive lawn, and can even damage your mower. A leveled lawn means:
- Smoother mowing: Your mower can glide across the surface, providing a consistent cut.
- Reduced wear and tear on equipment: Less jarring means your mower lasts longer.
- More enjoyable lawn care: Spend less time fighting bumps and more time enjoying your yard.
Enhanced Usability and Safety
Uneven terrain can be a tripping hazard, especially for children and the elderly. Whether you plan to play games on your lawn, host outdoor gatherings, or simply walk across it, a level surface is safer and more enjoyable.
- Safer play areas: Children can run and play without the risk of stumbling.
- Better for outdoor activities: Enjoy picnics, sports, or just lounging without worrying about uneven ground.
- Aesthetically pleasing: A smooth, flat surface contributes to a polished and well-maintained appearance.
Better Grass Growth and Health
Grass needs consistent sunlight, water, and nutrients to thrive. Unevenness can create microclimates within your yard:
- Low spots: May receive too much water and too little sun, hindering growth.
- High spots: May dry out too quickly and receive excessive sun, stressing the grass.
Soil leveling helps ensure that all areas of your lawn receive a more equitable distribution of these essential elements, promoting stronger, healthier grass across the entire yard.
Fathoming Your Yard’s Terrain: Initial Assessment
Before you grab any yard leveling tools, you need to carefully assess the current state of your yard. This step is crucial for planning your approach and gathering the right materials.
Identifying Problem Areas
Walk your yard thoroughly. Look for:
- Depressions and low spots: Areas where water visibly pools after rain.
- High spots and mounds: Bumps that disrupt the smooth surface.
- Visible slopes: Are there areas that drain too quickly or too slowly?
- Erosion points: Where is soil being washed away?
Marking the Unevenness
Use spray paint, stakes, or flags to mark the specific areas that need attention. This visual guide will be invaluable as you begin the ground leveling process. You can also use long, straight planks of wood or a long level to identify significant slopes and dips across larger areas.
Checking for Underground Obstructions
Before you start digging or moving significant amounts of soil, it’s wise to check for any underground utilities. Contact your local utility locating service (often called 811 in the US) a few days before you plan to start any major work. This is a free service and can prevent dangerous and costly accidents.
Gathering Your Yard Leveling Toolkit
Having the right yard leveling tools will make the job much easier and more effective. The size of your yard and the severity of the unevenness will influence the tools you need.
Essential Tools for DIY Yard Leveling
- Shovel (Spade and Garden Shovel): For digging up sod, moving soil, and filling in holes. A spade is better for cutting sod, while a garden shovel is good for moving loose soil.
- Rake (Garden Rake and Leveling Rake): A sturdy garden rake is good for breaking up soil and spreading material. A specialized landscape or lawn leveling rake (often with a long, flat metal head) is ideal for spreading soil and grading.
- Wheelbarrow: Essential for transporting soil, compost, or sand.
- Garden Hose or Sprinkler: To moisten the soil, making it easier to work with.
- Measuring Tape: For assessing the depth of low spots and the height of high spots.
- Level (Long Spirit Level or String Level): To check the evenness of the surface, especially for larger areas or creating specific slopes.
- Sod Cutter (Optional but Recommended for Larger Jobs): If you have significant areas of sod to remove, a sod cutter will save you a lot of time and effort.
- Compaction Tool (Tamper or Roller): To firm up the soil after filling low spots, preventing future settling.
Materials You Might Need
- Topsoil: For filling in low areas. Ensure it’s a good quality mix suitable for your climate and grass type.
- Compost or Organic Matter: To improve soil structure and fertility, especially if you’re adding a lot of new soil.
- Sand: Can be mixed with topsoil to improve drainage in heavy clay soils.
- Grass Seed or Sod: To re-establish grass in leveled areas.
Tackling the Bumpy Terrain: Step-by-Step Leveling
Now that you have your plan and tools, it’s time to get to work. Here’s a breakdown of how to level your yard.
Step 1: Removing Sod from High Spots
If you have significant mounds, you’ll need to remove the sod layer before you can reshape the underlying soil.
- Moisten the Area: Water the high spots the day before you plan to work. This makes the sod easier to cut and lift.
- Use a Sod Cutter or Flat-Edged Shovel:
- Sod Cutter: Set the depth to about 1-2 inches. Push the cutter forward to slice under the sod.
- Shovel: Insert a flat-edged shovel or spade at an angle under the sod and pry it up.
- Roll or Pile the Sod: Roll up the removed sod like a carpet or pile it. You can reuse this sod later in other areas or compost it.
Step 2: Redistributing Soil – Addressing High Spots
Once the sod is removed from the high spots, you can begin moving the excess soil.
- Shovel and Move: Use your shovel to move soil from the high areas to the low areas.
- Use a Wheelbarrow: Transport the soil efficiently using a wheelbarrow.
- Spread Evenly: As you move soil to low spots, use your rake to spread it out and break up any large clumps. Aim for a gradual slope rather than creating new abrupt changes.
Step 3: Filling Low Spots
This is where you’ll add new soil to bring the sunken areas up to grade.
- Add Soil Gradually: Don’t dump all the soil in one go. Add it in layers of a few inches at a time.
- Use a Rake to Spread: After adding a layer of soil, use your leveling rake or garden rake to spread it evenly across the low spot.
- Break Up Clumps: Ensure there are no large clumps of soil that could create new bumps.
- Moisten the Soil (Optional): Lightly watering the new soil can help it settle slightly, but avoid making it waterlogged.
Step 4: Compacting the Soil
This is a critical step to prevent the newly filled areas from sinking later.
- Use a Tamper: A hand tamper is effective for smaller areas. Place it on the soil and push down firmly.
- Use a Roller: For larger areas, a lawn roller filled with water is ideal. Roll the area multiple times.
- Foot Power: For very small repairs, you can compact the soil by walking on it repeatedly.
The goal is to create a firm base that won’t settle significantly after you’ve finished.
Step 5: Checking for Evenness and Making Adjustments
With the soil moved and compacted, it’s time to refine the surface.
- Use Your Level: Lay a long level or a straight plank across different sections of the yard. Look for gaps underneath or high points touching the level.
- Rake and Refine: Use your leveling rake to gently shave down high spots and fill in any remaining minor depressions.
- Water Test: After you’ve made your adjustments, lightly water the entire area. Watch closely to see where water pools. If you see pooling, you may need to make further minor adjustments. This is part of fixing uneven lawn areas.
Step 6: Re-establishing Grass
Once you’re satisfied with the levelness, it’s time to get grass growing.
- Sow Grass Seed:
- Lightly rake the surface to create a good seedbed.
- Spread grass seed according to the package directions.
- Lightly rake the seed into the top half-inch of soil.
- Gently water the area to keep the soil consistently moist until the seed germinates.
- Lay Sod:
- Ensure the soil surface is firm and slightly moist.
- Lay sod strips tightly together, staggering the seams like laying bricks.
- Firm the sod into the soil with your feet or a roller to ensure good contact.
- Water the sod thoroughly and keep it moist until it’s established.
Special Considerations for Fixing Uneven Lawn
Sometimes, your yard leveling project might require more specific techniques or address particular issues.
Dealing with Minor Bumps and Holes
For small, isolated bumps or holes, the process is simpler:
- Small Holes: Fill with topsoil, tamp down, and reseed.
- Small Bumps: You can often use a rake to shave down the bump. If it’s a significant bump, you might need to dig out a bit of soil, level the base, and then replace the sod or reseed.
Addressing Significant Slopes and Yard Grading
If your yard has a noticeable slope, you might need to undertake more extensive yard grading. This involves reshaping the land to create a more desirable contour, often to improve drainage away from the house.
- Gentle Slopes: For most residential yards, a gentle slope of 1-2% away from the house is ideal for proper yard drainage. This means for every 100 feet of horizontal distance, the land should drop 1 to 2 feet.
- Major Reshaping: For significant slopes or very uneven terrain, you might consider hiring a professional landscaper or renting heavier equipment like a skid steer. This is more advanced landscaping leveling that often requires expertise.
Mixing Soil Amendments for Better Results
When adding soil to low spots, consider amending it for a healthier lawn:
- Sandy Loam: A good mix of sand, silt, and clay is ideal. If your existing soil is heavy clay, mixing in some coarse sand and compost can improve drainage and aeration.
- Compost: Adding compost enriches the soil with nutrients and improves its structure, helping it retain moisture while still draining well.
Maintaining Your Level Lawn
Once your yard is beautifully leveled, consistent maintenance will keep it that way.
- Regular Mowing: Keep your grass at the appropriate height for your grass type.
- Watering: Water deeply and infrequently to encourage strong root growth.
- Aeration: Periodically aerate your lawn to improve soil structure and prevent compaction.
- Top-dressing: Applying thin layers of compost or topsoil can help fill in minor low spots that may develop over time.
- Inspect for New Bumps: Regularly walk your yard and address any small bumps or depressions as they appear before they become major issues.
Frequently Asked Questions (FAQ) About Yard Leveling
Here are answers to common questions about DIY yard leveling:
Q1: How much soil do I need to level my yard?
A1: The amount of soil you need depends on the size of your yard and the depth of the low spots. For small areas, a few bags of topsoil from a garden center might suffice. For larger jobs, you may need to order bulk topsoil. Measure the volume of your low spots (length x width x average depth) to estimate.
Q2: How long does it take to level a yard?
A2: This varies greatly. Leveling a few small bumps might take a couple of hours. Leveling a whole yard with significant unevenness can take a full weekend or longer, depending on the size and complexity.
Q3: Can I level my yard in any season?
A3: The best times for yard leveling are typically spring and fall when the weather is cooler and there’s adequate moisture for grass to establish. Avoid doing major leveling during the hottest part of summer or when the ground is frozen.
Q4: What’s the difference between leveling and grading?
A4: Leveling typically refers to making a small area flat or smooth. Grading is a broader term that involves reshaping the land’s contour to create specific slopes for drainage or aesthetic purposes. Yard leveling is often a component of yard grading.
Q5: How deep can I fill low spots without hurting my grass?
A5: You can generally add up to 4-6 inches of new topsoil to low spots without harming existing grass. If the low spot is deeper, you may need to remove the existing grass, add soil in layers, compacting each layer, and then reseed or resod. Avoid burying the grass crowns too deeply.
Q6: My yard has a significant slope. What should I do?
A6: For significant slopes that affect drainage or usability, you’ll need to focus on yard grading. This might involve moving large amounts of soil to create terraces or swales to manage water flow. If the slope is extreme, it’s often best to consult with a professional landscaper.
Q7: How do I prevent my leveled yard from settling?
A7: Proper compaction is key. After adding soil to low spots, use a tamper or roller to firm the soil. Adding organic matter like compost can also help create a more stable soil structure. Watering the area lightly after compaction can also help it settle naturally.
Conclusion: The Reward of a Level Lawn
Taking the time to properly level your yard is an investment that pays off significantly. From improving proper yard drainage and preventing erosion to making lawn care a breeze and enhancing safety, the benefits are substantial. By following these steps, gathering the right yard leveling tools, and putting in the effort, you can transform your bumpy, uneven yard into a smooth, healthy, and beautiful lawn that you can enjoy for years to come. Remember, DIY yard leveling is achievable with patience and the right approach. Happy leveling!