
Can I install a lawn sprinkler system myself? Yes, with careful planning and the right tools, you can successfully install a lawn sprinkler system yourself, saving money and gaining a deeper appreciation for your home’s irrigation. This comprehensive lawn sprinkler system installation guide will walk you through every stage, from initial design to the final controller programming. Whether you’re looking to set up a simple backyard irrigation system or a complex residential sprinkler installation, this DIY sprinkler system setup tutorial will equip you with the knowledge to create an efficient and effective underground sprinkler installation.
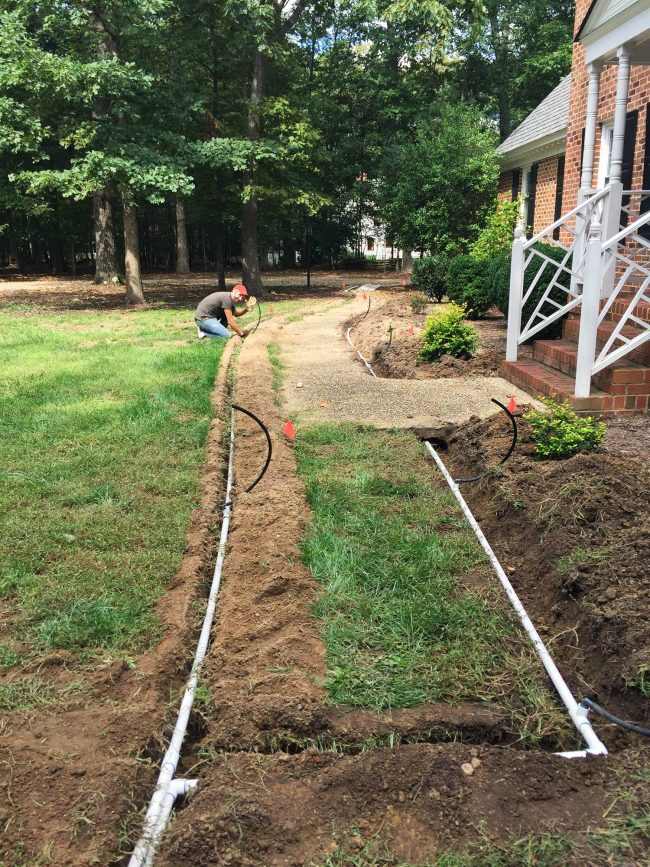
Image Source: www.younghouselove.com
Planning Your Sprinkler System
Before you dig, it’s crucial to plan. A well-thought-out plan prevents costly mistakes and ensures your system waters your lawn evenly and efficiently.
Assessing Your Lawn’s Needs
Every lawn is unique. Consider these factors:
- Lawn Size and Shape: Measure your entire yard. Note any irregular shapes or obstacles.
- Water Source: Identify your outdoor faucet or water connection point. Check its GPM (gallons per minute) and PSI (pounds per square inch) to ensure it can support your system. You can usually find this information on your water bill or by using a water meter.
- Soil Type: Sandy soil drains quickly and needs more frequent watering. Clay soil retains moisture longer and requires less frequent watering.
- Sun Exposure: Areas with full sun will dry out faster than shaded areas.
- Plant Types: Different plants have different watering needs. Group plants with similar requirements together.
- Existing Landscape: Note trees, shrubs, walkways, driveways, and other structures that might interfere with trenching or sprinkler head placement.
Creating a Sprinkler System Layout
A good layout is key to effective watering.
Zone Design
Divide your lawn into watering zones. Each zone will be controlled by a separate valve. This allows you to water different areas with different needs at different times.
- Factors for Zoning:
- Water pressure: Lower pressure areas might need smaller zones.
- Sun/Shade: Group sunny and shady areas separately.
- Plant types: Different plants require different watering frequencies and amounts.
- Slope: Steep slopes can cause runoff, so consider shorter watering times or different sprinkler types in these areas.
Sprinkler Head Placement
Proper sprinkler head placement ensures even coverage and avoids dry spots or overwatering.
-
Types of Sprinklers:
- Spray Heads: Best for small, irregularly shaped lawns. They spray water in a fan pattern.
- Rotor Heads: Ideal for larger, open areas. They rotate and spray a stream of water.
- Drip Irrigation: For flower beds, shrubs, and trees. It delivers water directly to the roots.
-
Coverage Rules:
- Head-to-Head Coverage: Each sprinkler head should spray water to the base of the next sprinkler head. This ensures no gaps.
- Adjust Nozzles: Most sprinkler heads have adjustable nozzles to fine-tune the spray pattern and distance.
- Avoid Obstacles: Position heads to avoid spraying walls, walkways, or driveways.
Drawing Your Plan
On a piece of graph paper or using online design tools, sketch your lawn.
- Mark Water Source: Indicate where your water connects.
- Draw Zones: Outline your proposed watering zones.
- Place Sprinkler Heads: Mark the location of each sprinkler head within its zone, ensuring head-to-head coverage.
- Route Pipes: Draw lines showing where your underground sprinkler installation pipes will run between the valve manifold and each sprinkler head.
- Locate Valves: Mark the position for your main shut-off valve and the valve manifold.
Gathering Your Materials and Tools
Having everything ready before you start digging will save you time and frustration.
Essential Materials
- Pipes: Polyethylene (poly) pipe is common for residential sprinkler installation. PVC pipe is also an option but requires more specialized tools and fittings.
- Sprinkler Heads: Choose the type and number based on your plan.
- Valves: Typically, you’ll need one valve for each zone, plus a main shut-off valve.
- Valve Box: Protects the valves and makes them accessible.
- Fittings: Elbows, tees, couplings, and adapters to connect pipes and sprinkler heads.
- Wire: Low-voltage sprinkler wire to connect the controller to the valves.
- Wire Connectors: Waterproof connectors for valve wiring.
- Backflow Preventer: Required by most local codes to prevent irrigation water from contaminating your drinking water.
- Pipe Cutter: For clean cuts on poly or PVC pipe.
- Shovel or Trencher: For digging trenches.
- Trenching Tools: If using a trencher, ensure you have safety gear.
- Wire Strippers: For preparing sprinkler wire.
- Screwdrivers: For wiring connections and valve assembly.
- Measuring Tape: For precise layout.
- Marker Flags or Spray Paint: To mark trench lines and sprinkler head locations.
- Level: To ensure proper pipe and valve box placement.
- PVC Cement and Primer (if using PVC): For joining PVC pipes.
- Thread Seal Tape (Teflon Tape): For threaded connections.
Optional but Recommended Tools
- Trenching Machine: For larger projects, renting a trencher can significantly speed up the process.
- Pipe Clamp: To temporarily stop water flow if needed.
The Installation Process: Step-by-Step
This section details the practical steps for your DIY sprinkler system setup.
Step 1: Mark Your Layout
Using your plan, mark the locations of all trenches, sprinkler heads, and the valve box on your lawn using marker flags or spray paint. This visual guide is essential for accurate digging.
Step 2: Digging Trenches (Trenching for Sprinkler Lines)
This is often the most physically demanding part.
- Trench Depth: Aim for a trench depth of 6-8 inches for most residential systems. This protects the pipes from lawnmower blades and frost.
- Trench Width: The width should be just enough to accommodate the pipe and your tools.
- Using a Shovel:
- Dig along your marked lines.
- Create a clean edge by pushing the shovel down vertically.
- Lift the sod out carefully. You can reuse it later to cover the trenches.
- For a smoother pipe lay, remove excess soil from the bottom of the trench.
- Using a Trencher:
- Follow the manufacturer’s instructions carefully.
- Ensure you have the correct blade depth set.
- Operate slowly and steadily.
- Be aware of underground utilities – call 811 before you dig!
Important Note on Utilities: Always call 811 (in the US) before you dig. This free service will contact local utility companies to mark any underground lines (gas, electric, water, cable) in your work area. This is a critical safety step.
Step 3: Installing the Valve Manifold
The valve manifold is where your zone valves are housed.
- Excavate the Valve Box Area: Dig a larger hole where the valve box will sit, ensuring it’s deep enough for the box and easy access to the valves.
- Assemble the Valves: Connect the valves together using short pipe nipples and fittings. Ensure they are oriented correctly for water flow.
- Connect to Main Water Line: Connect your main shut-off valve to your home’s water supply. This might involve tapping into an existing line or connecting to an outdoor faucet.
- Place the Manifold: Position the assembled valves inside the valve box. Ensure the box is level and the top is at or slightly above ground level for easy access.
- Connect Pipes to Valves: Connect the pipes from your sprinkler heads to the appropriate valves.
Step 4: Laying the Pipes
Now it’s time to place the pipes in the trenches.
- Connect Pipes: Lay out your poly pipe in the trenches. Use fittings (couplings, elbows, tees) to make connections as needed.
- Install Sprinkler Heads:
- Attach risers and sprinkler heads to the pipes.
- Ensure the top of the sprinkler head is at ground level when installed to avoid damage from lawnmowers and to allow for proper coverage.
- Use a small piece of scrap pipe or a coupling to adapt from the main pipe to the sprinkler head.
- Flush the Lines: Before attaching sprinkler heads, turn on the water briefly to flush out any dirt or debris from the pipes.
Step 5: Wiring the System
Low-voltage wire connects your controller to the valves.
- Run the Wire: Lay the sprinkler wire in the same trenches as the pipes, or in a separate shallow trench. Keep it neat to avoid damage.
- Connect to Valves:
- At each valve, strip a small amount of insulation from two wires.
- Connect one wire to the common terminal on the valve and the other to the zone terminal using waterproof wire connectors.
- Ensure all common wires from each valve are connected together and run back to the controller.
- Connect to Controller: Run the wire bundle back to the location of your sprinkler controller. Connect the common wire to the “COM” terminal and each zone wire to its corresponding zone terminal (e.g., Zone 1, Zone 2, etc.).
Step 6: Installing the Controller
The controller is the “brain” of your sprinkler system.
- Choose a Location: Mount the controller indoors or in a protected outdoor location, near a power source.
- Mount the Controller: Securely mount the controller to a wall using screws.
- Connect Wiring: Connect the low-voltage wires from the valves to the appropriate terminals on the controller as described in Step 5. Connect the power supply.
Step 7: Connecting to the Water Supply and Backflow Preventer
This is a critical step that requires care.
- Install Backflow Preventer: Install the backflow preventer according to local plumbing codes and manufacturer instructions. It typically installs after your main shut-off valve.
- Connect Main Line: Connect the main supply pipe from your water source to the backflow preventer and then to your valve manifold. Use appropriate fittings and ensure all connections are secure and watertight. Thread seal tape is essential for threaded connections.
Step 8: Testing the System
Before backfilling, test each zone.
- Turn on Water: Slowly open the main shut-off valve.
- Manually Activate Zones: Go to your controller and manually run each zone.
- Check for Leaks: Inspect all connections for leaks. Tighten any loose fittings.
- Adjust Sprinkler Heads: Check that each sprinkler head is spraying correctly and adjust nozzles as needed for proper coverage. Ensure heads pop up and retract properly.
Step 9: Backfilling the Trenches
Once you’re satisfied that the system is leak-free and operating correctly, it’s time to backfill.
- Replace Sod: Carefully place the sod you removed back over the trenches.
- Fill with Soil: If you didn’t save sod, fill the trenches with the soil you excavated. Tamp it down lightly.
- Water the Area: Water the newly filled trenches to help the soil settle.
Controller Programming
This is where you tell your system when and how long to water.
Basic Programming Steps
- Set Date and Time: Ensure the controller has the correct current date and time.
- Assign Zones: Program each zone number according to your layout.
- Set Watering Days: Choose which days of the week you want each zone to water.
- Set Start Times: Determine the best time to water for each zone (usually early morning to minimize evaporation).
- Set Watering Durations: Adjust the run time for each zone based on its needs (plant type, sun exposure, soil type).
- Sandy Soil: Shorter, more frequent watering.
- Clay Soil: Longer, less frequent watering.
- Sunny Areas: Longer durations.
- Shady Areas: Shorter durations.
- Rain Sensor (If Installed): If you have a rain sensor, ensure it’s enabled in the controller settings.
Advanced Features
Many controllers offer advanced features like:
- Seasonal Adjust: Automatically adjusts watering schedules based on the time of year.
- Weather-Based Watering: Uses local weather data to optimize watering.
- Multiple Start Times: Allows for more than one watering start time per day for a zone.
Sprinkler System Maintenance Tips
Regular maintenance keeps your system running efficiently.
- Check Sprinkler Heads: Periodically inspect heads for damage, clogs, or improper spray patterns. Clean or replace as needed.
- Adjust Watering Schedules: As seasons change, adjust your watering durations and frequencies.
- Winterization: In colder climates, you’ll need to drain the system to prevent freezing and damage. This usually involves blowing out the lines with compressed air.
- Spring Start-up: After winter, slowly turn the water back on and test each zone for leaks and proper operation.
- Filter Cleaning: If your system has filters, clean them annually.
- Listen for Leaks: Pay attention to unusual sounds like hissing, which could indicate a leak.
Troubleshooting Common Issues
Even the best systems can develop problems.
| Issue | Possible Cause | Solution |
|---|---|---|
| Sprinkler Not Working | Valve not opening, wire disconnected, clogged head | Check wiring, manually activate valve, clean or replace head. |
| Low Water Pressure | Partially closed valve, clogged filter, main line issue | Ensure all valves are fully open, clean filter, check main water supply. |
| Uneven Watering | Improper sprinkler head placement, wrong nozzle | Adjust head placement, change nozzle type or arc, ensure head-to-head coverage. |
| Leaking Fittings | Loose connection, damaged fitting | Tighten fittings, replace damaged fittings, reapply thread seal tape. |
| Zone Not Turning Off | Valve stuck open, faulty solenoid | Manually shut off water to the zone, replace valve or solenoid. |
Frequently Asked Questions (FAQ)
Q1: How deep should I dig trenches for sprinkler lines?
A1: For most residential sprinkler installation, trenches should be 6 to 8 inches deep to protect the pipes from damage and frost.
Q2: What is the best time of day to water my lawn?
A2: The best time is early morning, typically between 4 AM and 10 AM. This minimizes water loss due to evaporation and allows plants to absorb water before the heat of the day.
Q3: How do I know if my water pressure is sufficient?
A3: You can measure your water pressure using a pressure gauge that attaches to an outdoor faucet. You also need to know your home’s GPM (gallons per minute) capacity. Your water provider can supply this information.
Q4: Do I need a backflow preventer?
A4: Yes, most local plumbing codes require a backflow preventer to protect your drinking water supply from potential contamination by irrigation water.
Q5: How often should I adjust my sprinkler system’s watering schedule?
A5: You should adjust your watering schedule seasonally. Check your lawn regularly and adjust durations based on weather conditions, rainfall, and your lawn’s needs.
Q6: Can I connect my sprinkler system to a well?
A6: Yes, but you’ll need a robust filtration system to prevent sediment from clogging your sprinkler heads and valves. You may also need a pressure tank.
Q7: How do I winterize my sprinkler system?
A7: Winterization typically involves draining all water from the system to prevent freezing. This is often done by using compressed air to blow out the lines. Consult a professional if you’re unsure.
Q8: What are the benefits of a drip irrigation system for my backyard irrigation system?
A8: Drip irrigation delivers water directly to the plant roots, reducing water waste through evaporation and runoff, promoting healthier plant growth, and minimizing weed growth in non-irrigated areas.
Installing a lawn sprinkler system is a rewarding project. By following this detailed lawn sprinkler system installation guide, you can transform your yard’s watering routine, ensuring a healthy and vibrant landscape with your new backyard irrigation system. Enjoy the benefits of a perfectly watered lawn!