
Thinking about installing a sprinkler system yourself? Yes, you absolutely can install a lawn irrigation system as a DIY project with careful planning and execution! This guide will walk you through everything you need to know to get your DIY lawn sprinklers up and running, ensuring a lush and healthy lawn.
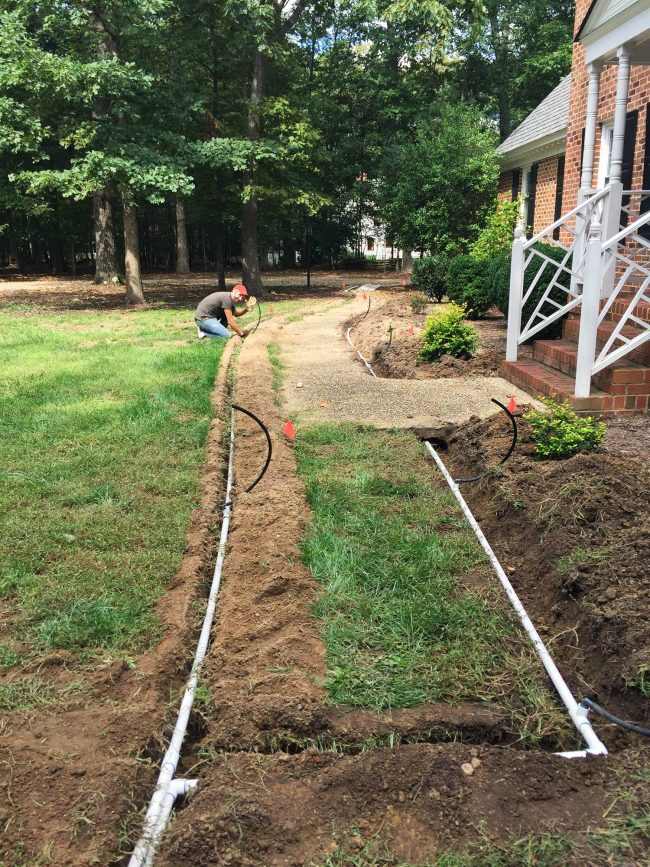
Image Source: www.younghouselove.com
Planning Your Irrigation System Design
Before you even think about digging, a solid irrigation system design is crucial. This is the blueprint for your entire project. It ensures you cover your lawn effectively and use water wisely.
Assessing Your Lawn’s Needs
Every lawn is different. Factors like grass type, soil composition, sun exposure, and slope all influence watering needs.
- Grass Type: Different grasses have varying water requirements. Cool-season grasses like fescue and bluegrass need more water than warm-season grasses like Bermuda and zoysia.
- Soil Type: Sandy soils drain quickly and need more frequent watering, while clay soils retain moisture and require less frequent but longer watering.
- Sun Exposure: Areas with full sun will dry out faster and need more water than shady spots.
- Slope: Sloped areas can experience runoff, so you might need to adjust watering times or use different sprinkler types.
Mapping Your Yard
Create a scaled drawing of your property. This map should include:
- Your house and any outbuildings.
- Driveways, patios, and walkways.
- Trees, shrubs, and garden beds.
- The location of your main water shut-off valve.
- The location of your outside spigot or hose bib.
- The overall shape and dimensions of your lawn.
Determining Sprinkler Head Placement
Proper sprinkler head placement is key to avoiding dry spots and overwatering. You want head-to-head coverage, meaning the spray from one head reaches the next.
- Rotary Sprinklers: Best for larger, open areas. They cover a wider radius.
- Spray Sprinklers: Ideal for smaller, irregularly shaped areas or flower beds.
- Drip Irrigation: Excellent for garden beds, trees, and shrubs. It delivers water directly to the roots, reducing waste.
Calculating Water Pressure and Flow Rate
You need to know your home’s water pressure and flow rate to ensure your system works efficiently.
- Water Pressure (PSI): Measure this with a pressure gauge attached to an outdoor spigot.
- Flow Rate (GPM – Gallons Per Minute): Time how long it takes to fill a known-size container (like a 5-gallon bucket) from your spigot.
Table: Typical Sprinkler Head GPM Requirements
| Sprinkler Type | Typical GPM Range |
|---|---|
| Rotary Sprinkler | 3 – 10 |
| Spray Sprinkler | 1 – 3 |
| Drip Emitters | 0.5 – 1 |
You’ll need to ensure the total GPM of all sprinkler heads running simultaneously on one zone doesn’t exceed your home’s available flow rate.
Gathering Your Materials and Tools
Once you have your design, it’s time to buy the components and get your tools ready.
Essential Components
- Sprinkler Heads: Choose the right type and quantity based on your design.
- Pipes: PVC or Polyethylene (poly) pipe are common choices for underground irrigation setup. Poly pipe is more flexible and easier to work with for DIY projects.
- Fittings: Elbows, tees, couplings, and adapters to connect pipes and sprinkler heads.
- Valves: Solenoid valves control water flow to different zones. You’ll need a valve for each zone.
- Sprinkler Controller (Timer): This is the brain of your system, automating watering schedules.
- Backflow Preventer: Crucial for preventing irrigation water from contaminating your home’s drinking water supply.
- Wire: Low-voltage wire to connect the controller to the solenoid valves.
- Wire Connectors: Waterproof connectors for the wiring.
- Pipe Cement and Primer (for PVC): If you choose PVC pipe.
- Hole Saw or Pipe Punch: To attach sprinkler risers to pipes.
- Pipe Clamps or Risers: To connect sprinkler heads to the main pipe.
Necessary Tools
- Shovel or Trencher: For digging trenches for irrigation pipes. A manual trencher can be easier for smaller jobs, while a rented power trencher is best for larger areas. For minimal disruption, consider trenchless irrigation methods if available.
- Measuring Tape: For accurate layout.
- Marker Flags or Spray Paint: To mark pipe and sprinkler locations.
- Pipe Cutter: For clean cuts on pipes.
- Wire Strippers and Crimpers: For electrical connections.
- Screwdrivers: For controller installation.
- Level: To ensure proper pipe slope.
- Safety Glasses and Gloves: Always protect yourself.
The Installation Process: Step-by-Step
Now, let’s get down to the actual work of installing your underground irrigation setup.
Step 1: Laying Out the System
Using your design map and marker flags, lay out the planned path of your pipes and the locations of your sprinkler heads on the lawn. This visual representation helps ensure accuracy before you start digging.
Step 2: Connecting to the Water Supply
This is a critical step and often requires shutting off your main water supply.
- Locate Your Main Shut-Off Valve: Know where it is before you start.
- Connect to a Hose Bib or Main Water Line: The most common DIY approach is to connect to an existing outside hose bib. This often involves using a backflow preventer and a transition fitting. For a more permanent setup, you might tap into your main water line. It is highly recommended to consult a plumber for this step if you are unsure.
- Install the Backflow Preventer: This device must be installed between your water source and the rest of the irrigation system. It prevents contaminated water from flowing back into your potable water supply. Ensure it’s installed according to local plumbing codes.
Step 3: Trenching for Irrigation Pipes
This is the most physically demanding part of the DIY lawn sprinklers project.
- Trench Depth: Aim for a depth of 6-8 inches for most pipes. This protects them from lawnmower damage and frost in colder climates.
- Trench Width: Just wide enough for the pipe and your hands to work.
- Digging Method:
- Manual Shoveling: Effective for small areas or if you want to save money. Dig a narrow, consistent trench.
- Manual Trencher: A long-handled tool that makes cutting trenches easier than a standard shovel.
- Power Trencher Rental: For larger lawns, this is the most efficient option. It cuts a neat, consistent trench quickly.
- Trenchless Irrigation: For those who want minimal disruption to their lawn, trenchless methods use specialized equipment to pull pipes underground without extensive trenching. This is often a professional service but worth exploring if lawn aesthetics are a top priority.
Step 4: Laying the Pipes and Connecting Sprinkler Heads
With your trenches dug, it’s time to lay the piping.
- Connect Pipes: Lay out your main lines and lateral lines according to your design. Use the appropriate fittings (elbows, tees) to make turns and branches.
- For PVC: Apply primer to both surfaces, then pipe cement. Quickly join the pieces and hold them together for about 30 seconds to allow the cement to set.
- For Poly Pipe: Use barbed fittings with hose clamps or compression fittings.
- Connecting Sprinkler Heads:
- Install risers or swing joints onto the main pipe at the marked locations for your sprinkler heads.
- Attach the sprinkler heads to the risers. Ensure the heads are at the correct height and perpendicular to the ground.
- Check for Proper Connections: Make sure all joints are secure and watertight.
Step 5: Installing the Valves and Controller
The valves control water flow to different zones, and the controller manages the watering schedule.
- Valve Manifold: Group your solenoid valves together in a valve box. This makes them accessible for maintenance and programming. Place the valve box in an inconspicuous but accessible location.
- Wiring: Run low-voltage wire from the intended controller location to each valve. Use waterproof wire connectors to attach the wire to the valve solenoids.
- Each valve typically has two wires: a common wire that connects to all valves and a “hot” wire that connects to the individual valve.
- Controller Installation:
- Mount the controller on a wall, usually in a garage or outdoor shed, in a location protected from the elements.
- Connect the common wire and the individual zone wires to the appropriate terminals on the controller.
Step 6: Wiring the System
This part requires some basic electrical understanding.
- Identify Wire Pairs: Each valve will have two wires. One is the “common” wire, and the other is the “zone” wire.
- Connect to Controller:
- Run the common wire from the valve manifold to the “common” terminal on the controller.
- Run the zone wire for each valve to its corresponding zone terminal on the controller (Zone 1, Zone 2, etc.).
- Use Waterproof Connectors: Always use waterproof connectors to protect the electrical connections from moisture. This is crucial for the longevity of your system.
Step 7: Testing the System
Before backfilling the trenches, it’s essential to test everything.
- Turn on Water Supply: Slowly open the main water valve.
- Check for Leaks: Inspect all connections for any drips or leaks. Tighten fittings as needed.
- Test Each Zone: Manually activate each zone from the controller.
- Observe each sprinkler head. Does it pop up and spray properly?
- Is the coverage adequate? Are there any heads that are spraying too much or too little?
- Are there any leaks at the sprinkler heads or pipe connections?
- Adjust Sprinkler Heads: Most sprinkler heads can be adjusted to change the spray pattern, direction, and radius. Make any necessary adjustments now.
Step 8: Backfilling the Trenches
Once you’re confident there are no leaks and everything is working correctly, you can backfill the trenches.
- Carefully Fill: Use the soil you removed when digging.
- Compact the Soil: Gently compact the soil as you fill to prevent settling later.
- Restore Lawn: If you removed sod, carefully replace it over the filled trenches. Water the area to help the sod settle and re-establish.
Step 9: Programming the Sprinkler Controller
This is where you tell your system when and how much to water.
- Set Date and Time: Ensure the controller has the correct current date and time.
- Create Watering Schedules:
- Watering Days: Choose which days you want to water.
- Start Times: Set the best times to water (early morning is usually best to minimize evaporation).
- Watering Durations: Specify how long each zone should run. This will vary depending on your grass type, soil, and sprinkler output.
- Rain Sensor (Optional but Recommended): If you install a rain sensor, program the controller to recognize it. This will automatically skip watering cycles when it rains, saving water.
- Seasonal Adjustments: Many controllers allow for seasonal adjustments to increase or decrease watering duration as temperatures and rainfall change.
Troubleshooting Common Issues
Even with careful installation, you might encounter a few hiccups.
- Low Water Pressure: Check for leaks, ensure all valves are fully open, and verify that the flow rate of your system doesn’t exceed your home’s supply.
- Sprinklers Not Popping Up: Check the wiring connection to the valve, ensure the valve is receiving power, and check for debris inside the sprinkler head.
- Uneven Watering: Adjust sprinkler head nozzles or consider adding or repositioning sprinkler heads for better coverage.
- Leaks: Re-inspect all connections and tighten or re-cement as necessary.
Frequently Asked Questions (FAQ)
Can I install an irrigation system myself?
Yes, you can install a lawn irrigation system as a DIY project. With careful planning, the right tools, and attention to detail, a homeowner can successfully set up their own sprinkler system.
How deep should irrigation pipes be buried?
Irrigation pipes are typically buried 6 to 8 inches deep. This depth protects them from damage from lawnmowers and aerators, and in colder climates, it helps prevent them from freezing.
What is a backflow preventer and why is it important?
A backflow preventer is a safety device that stops irrigation water from flowing back into your home’s drinking water supply. This prevents any potential contamination from fertilizers, pesticides, or standing water in the irrigation system from entering your potable water. It’s a crucial component for safety and is often required by local building codes.
How do I connect sprinkler heads to the irrigation pipes?
Sprinkler heads are typically connected to the main irrigation pipes using risers or swing joints. These flexible or rigid extensions attach to fittings on the pipe and provide a secure point to screw in the sprinkler head, allowing for precise height and positioning.
Is trenchless irrigation better than traditional trenching?
Trenchless irrigation methods are generally preferred when preserving the existing lawn is a high priority, as they involve minimal disruption. However, they often require specialized equipment and can be more expensive than traditional trenching. Traditional trenching, while more disruptive, is a more accessible DIY method for many homeowners.
How do I design my irrigation system?
To design your irrigation system, start by mapping your lawn, identifying watering needs for different areas, calculating your water pressure and flow rate, and then determining the best placement and type of sprinkler heads for optimal coverage.
By following these steps, you can effectively install your own lawn irrigation system, ensuring a healthier, greener lawn with less effort.